Kayaking comes with its challenges, and one of the most important skills to master is kayak self-rescue. Knowing how to perform a self-rescue can make all the difference when you capsize and need to get back into your kayak safely. This not only helps keep you safe but also ensures you can continue your adventure without needing external help.
Many kayakers sometimes wonder, “What should I do if I flip over alone on the water?” That’s where self-rescue techniques come in handy. From deploying paddle floats to practicing the Cowboy Rescue, there’s a method for everyone. We’ll explore various strategies and offer tips to perfect your technique so you feel confident and prepared.
Safety is crucial in kayaking, and self-rescue is a key component. We’ll share expert insights on the best preparation practices and safety gear to carry with you. By learning these techniques, you’re not just improving your kayaking skills but also enhancing your overall safety and enjoyment on the water.
Key Takeaways
- Self-rescue skills are essential for kayaking safety.
- Different techniques like the Cowboy Rescue can be practiced.
- Always carry safety gear and practice in controlled environments.
Understanding Capsizing
Capsizing is a common occurrence for kayakers and understanding its causes and how to avoid it can improve safety. Knowing what triggers a capsize and anticipating dangerous conditions are crucial skills.
Causes of Capsizing
Several factors can lead to capsizing. Strong currents can push your kayak sideways, making it difficult to maintain balance. Waves, especially those coming from the side, can also tip you over.
Obstacles like submerged rocks or fallen branches pose risks as well. When you hit them, the impact can destabilize the kayak. Poor paddling technique can also result in a capsize. For example, leaning too far to one side or not keeping a low center of gravity can make you unstable.
Wind is another factor that can affect stability. Strong gusts can catch the side of your kayak and tip it over if you’re not prepared.
Predicting and Avoiding Capsizes
One of the keys to avoiding capsizes is being able to predict risky situations. Start by checking the weather forecast. High winds, strong currents, and large waves increase the chances of capsizing.
Choose your paddling location wisely. Avoid areas with lots of obstacles like rocks or logs. If you’re paddling in a new area, take some time to scout for hazards.
Improving your paddling technique can also reduce the risk of capsizing. Practice maintaining a low center of gravity and staying balanced. Use proper paddling strokes to keep the kayak stable even in challenging conditions.
Lastly, stay alert to your surroundings and make quick adjustments. If you see a big wave or obstacle ahead, be ready to adjust your position or change direction. Awareness and quick reflexes are critical for preventing capsizes. For more information on handling capsizing and self-rescue techniques, visit NOLS and Paddling.com.
Preparation and Safety Gear
Ensuring you have the right safety gear is vital when kayaking. Essential equipment, a proper personal flotation device (PFD), and having a partner can all improve safety and confidence on the water.
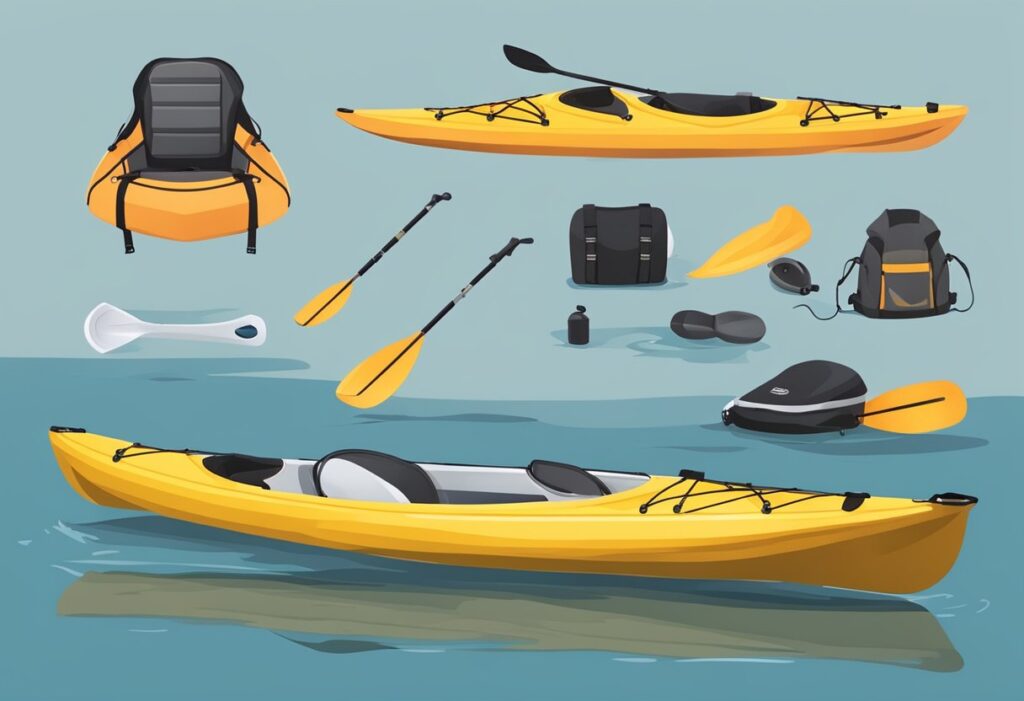
Essential Equipment
When preparing for a kayaking trip, having the right equipment can make all the difference. A paddle float is crucial. If you capsize, the paddle float helps stabilize your kayak, making it easier to re-enter.
A spray skirt keeps water out of your kayak, important for staying dry and maintaining control. To remove water that does get in, you’ll need a bilge pump. This simple hand pump expels water quickly.
Don’t forget a whistle and distress signal. These can alert others if you need help. Safety gear saves lives. Always check your gear for damage before heading out.
Wearing the Correct PFD
One of the most important safety items is your personal flotation device (PFD). It should fit snugly but comfortably, allowing full movement. Look for a PFD with multiple adjustments and pockets for gear.
We recommend a brightly colored PFD for visibility. Check periodically to ensure it’s in good condition. Always wear your PFD on the water. Even experienced kayakers can encounter unexpected currents or weather changes.
A good PFD can keep your head above water if you capsize. Make sure it has a whistle attached so you can signal for help. Prioritize getting a high-quality PFD—this is not the place to cut corners.
Importance of a Partner
Kayaking with a partner increases safety. If something goes wrong, having another person to assist or call for help can be crucial. Partners can help each other with rescues and navigation, especially in difficult conditions.
Discuss hand signals and what to do in an emergency before you head out. Staying within sight and hearing distance of each other is important. A group offers even more safety, as more people mean more help if needed.
Remember, a partner isn’t just about safety; it also makes the kayaking experience more enjoyable. Share the adventure and look out for each other. This simple step can greatly increase your enjoyment and peace of mind on the water.
Self-Rescue Techniques
Kayak self-rescue is essential for any paddler. Knowing how to perform techniques like the wet exit, Eskimo roll, paddle float rescue, and scramble self-rescue can keep you safe on the water.
Wet Exit
First, let’s talk about the wet exit. This is your first step if you capsize. Staying calm is key. While underwater, tap your kayak three times to signal you’re okay if others are nearby. Pull the spray skirt loop to release it. Then, push yourself out of the kayak. Remember to hold onto your paddle and kayak to prevent losing them in the current.
Once you’re out, stay close to your kayak. It’s important not to drift away. This technique ensures you’re in control even when things go wrong.
Eskimo Roll
Mastering the Eskimo roll can save you from fully exiting your kayak. This technique involves righting your kayak while staying in it. Start by tucking your paddle against the kayak and reaching across it. With a swift hip snap and pulling on the paddle, your kayak should roll upright.
Practice is crucial for this maneuver. Spend time in calm waters perfecting your roll. It might sound tricky, but with repetition, it becomes a powerful tool in your self-rescue toolkit.
Paddle Float Rescue
For the paddle float rescue, you’ll need a paddle float, a small inflatable device. Start with inflating the float and securing it to one end of your paddle. Position the paddle perpendicular to the kayak, so it acts as a stabilizer.
With your legs out behind you, give a strong kick and pull yourself onto the kayak using the paddle for support. This technique is especially useful when you’re too tired to perform a more strenuous re-entry.
Practice this in calm water first to build confidence before heading into rougher conditions. Check out REI’s guide on paddle float rescue for more detailed steps.
Scramble Self-Rescue
The scramble self-rescue, also known as the cowboy rescue, is straightforward. After capsizing, position yourself at the stern (back) of the kayak. Kick your legs to give momentum as you pull your chest onto the kayak.
Once on top, shimmy forward towards the cockpit. Sit down and steady yourself. It’s a more direct approach and can be quicker if you’ve practiced it a few times.
This method relies on your ability to remain calm and act swiftly. Ensure you practice in various conditions to perfect this technique.
Self-rescue in kayaking can seem daunting at first, but with regular practice and a calm mindset, you can handle most situations confidently.
Practicing in Controlled Environments
Practicing in a controlled environment helps kayakers build muscle memory and confidence. It’s essential for learning rescue techniques without the pressure of real-life situations.
Simulated Rescue Scenarios
Simulated rescue scenarios are crucial for preparing for emergencies. We start in calm waters where paddlers can focus on the mechanics of self-rescue. For example, practicing wet exits in a pool helps kayakers get used to escaping the kayak underwater.
Once comfortable, we move to slightly rougher waters to simulate real conditions. During these drills, we practice remaining calm, which is key to efficient self-rescue. By mimicking various scenarios, such as capsizing or dealing with tangled debris, we train our responses.
We often use training partners to act as kayakers in trouble. This adds realism to the practice, ensuring we’re prepared to assist others as well. Over time, these scenarios become second nature, making us more confident on the water.
Practice Drills
Practice drills are routine exercises that build our skills and muscle memory. One common drill is the Eskimo roll, which helps us recover from capsizing without exiting the kayak. We initially practice this in pools, where we can focus on the technique.
Another vital drill is the paddle float self-rescue. We practice deploying the paddle float and using it to stabilize the kayak. This drill is repeated until it becomes second nature. We also incorporate drills for re-entering the kayak from the water, starting in calm conditions and progressing to more challenging environments.
Using controlled environments for these drills helps reduce the risk of injury and build our confidence. Regular practice ensures we can handle unexpected situations safely and efficiently. Through consistent drills, we strengthen our skills and readiness for various kayaking conditions.
Body Mechanics and Maneuvering
Understanding body mechanics is key to executing self-rescue techniques effectively. This includes how we use our hips, how we grip the paddle, and how we position our head during rolls.
Hip Snap and Balance
The hip snap is crucial for righting the kayak and stabilizing balance in the water. This move isn’t about raw strength, but rather swift, controlled motion from the hips. We start by leaning our bodies out of the kayak, then sharply snapping our hips under and against the water to flip the kayak back upright.
Practicing hip snaps helps us develop a feel for maintaining balance. We lean the kayak to each side, getting comfortable with how much tilt is manageable. This skill allows us to react quickly if we hit a tipping point, without overwhelming our bodies. It’s important to engage our core muscles to maintain stability throughout the motion.
Proper Paddle Grip
A correct paddle grip can dramatically improve our maneuvering ability. Hold the paddle so that hands are about shoulder-width apart, with the knuckles aligned along the top of the paddle shaft. This grip gives us both strength and control, allowing precise movements and reducing fatigue.
We should use a relaxed but firm grip, avoiding gripping too tight, which can lead to unnecessary strain. During strokes, maintain a slightly bent arm posture to absorb shocks and generate more leverage. The blades should enter and exit the water smoothly, providing efficient propulsion and better control over the kayak’s direction.
Head Positioning in Rolls
Head positioning during rolls is often overlooked, but it’s critical for successful self-rescue. As we roll the kayak, the head must be the last part of the body to come out of the water. This sequence helps maintain momentum and allows the body to use the water’s resistance effectively.
We start by tucking our bodies and keeping the head low and close to the water. As the kayak comes upright, we let our head follow, moving in a controlled and gradual motion. Proper head positioning ensures that the kayak completes its roll smoothly and we maintain control throughout the maneuver. Practicing in controlled conditions helps ingraining this technique for real-life scenarios.
Navigating Rough Waters
When kayaking in rough water, staying safe and knowing how to rescue yourself is crucial. Conditions can quickly change, making it vital to practice specific techniques for rough conditions and rescues in waves and rapids.
Techniques for Rough Conditions
Navigating rough water often requires mastering advanced paddling techniques. One effective method is the brace stroke, which helps you stabilize your kayak when facing turbulent waters. This involves using your paddle to push against the water’s surface, keeping you upright.
Another key skill is learning to read the water. Observing wave patterns and current flows can help you anticipate hazards and navigate more effectively. For example, if you spot a calm spot behind a rock, you can head there for a brief rest.
Practicing wet exits in rough conditions is also important. If you capsize, knowing how to safely exit your kayak can prevent panic and injury. Always wear a life jacket and practice in safe environments before tackling more challenging waters.
Rescues in Waves and Rapids
When dealing with a capsized boat in waves or rapids, staying calm is your first priority. If you can’t roll your kayak back up immediately, you’ll need to perform a wet exit. After exiting, keep hold of your paddle and kayak to avoid losing them.
Using the paddle float rescue can be effective in waves. Attach a paddle float to the end of your paddle and use it as an outrigger to stabilize your kayak while you re-enter. This technique is particularly useful in open water with significant wave action.
In rapids, guiding your kayak to an eddy can provide a safer spot for re-entry. Eddies, which are calm areas behind obstacles, allow for a controlled environment to get back into your kayak. Always keep your body oriented downstream to avoid injury and ensure you move quickly to safer water.
For more specific guidance on rescuing in rough conditions, check out these self-rescue techniques and detailed methods for rescue in rapids.
Recovery and Getting to Safety
After a successful self-rescue, it’s crucial to ensure that your kayak is safe to paddle again and to return to shore or seek help. This section discusses the essential steps to get rid of excess water and how to navigate back to safety.
Bailing Water and Re-entry
Once you’ve managed to re-enter the kayak, the first thing you need to do is remove any water that entered your kayak during the capsize. Using a bilge pump or a sponge can be quite effective. A bilge pump will allow you to quickly remove large amounts of water, while a sponge is useful for soaking up smaller amounts left behind.
If you don’t have a pump, you can use a container or a water bottle to bail out the water. This process takes longer, but it’s better than paddling with excess water inside your kayak. Ensuring your kayak is as dry as possible is important for stability and safety. Make sure to secure any loose gear before you start paddling again.
Returning to Shore or Help
With your kayak now water-free, it’s time to think about the best way to get to safety. If you’re close to shore, paddle towards it using a steady and controlled stroke. Keep an eye out for hazards that could have caused the capsize in the first place, like rocks or strong currents.
If you’re further away from land, it’s important to head towards a place where you can safely exit the water. Sometimes seeking help is the best course of action. In such cases, use a whistle or a waterproof radio to call for assistance. Keeping a calm and methodical approach will help ensure that you get back to safety without further incident.
Expert Insights and Training
Learning how to rescue yourself while kayaking involves both theoretical knowledge and hands-on practice. Expert guidance and formal instruction ensure that you master the essential techniques.
Learning from Professionals
We often turn to experienced professionals to teach us vital kayak self-rescue skills. Experts like Ken Whiting offer valuable insights through instructional videos and articles. Training with pros is beneficial as they provide immediate feedback, correct mistakes, and share nuanced techniques that are difficult to grasp alone.
Additionally, being part of a group session allows us to observe and learn from others’ experiences. Learning from certified instructors ensures that we receive accurate and current information, enhancing our safety and confidence on the water.
Certified Courses and Clinics
Taking certified courses, such as those offered by the American Canoe Association (ACA), can significantly improve our self-rescue skills. These courses cover various techniques, including the bomb-proof roll, which is essential for re-entering the kayak without exiting.
We can also attend rolling clinics, which are specialized workshops focusing on improving our rolling techniques under different conditions. These courses typically include comprehensive instruction, ample practice time, and feedback from certified instructors, making them highly effective for mastering self-rescue.
Engaging in ACA-certified courses ensures we gain reliable knowledge and skills from recognized experts in the paddling community.
Frequently Asked Questions
Kayak self-rescue is a crucial skill for any paddler. From mastering solo re-entries to adapting techniques for different kayak models, we answer common questions that paddlers often have about self-rescue.
Q: What are the essential techniques for solo kayak re-entry after a capsize?
A: The Eskimo Roll is a fundamental skill for righting your kayak. Wet exits and re-entries are also key techniques. Start by exiting the kayak safely, then practice re-entering without tipping again.
Q: How can you perform a kayak self-rescue without the use of a paddle float?
A: For paddlers without a paddle float, tipping the kayak intentionally during practice helps get a feel for balance. This involves leaning side to side until capsizing and focusing on how to re-enter safely using your own strength and kayak stability.
Q: What are the key steps to safely executing a T-rescue with another kayak?
A: A T-rescue involves another kayaker coming to your aid. Place the bow of the assisting kayak perpendicular to your cockpit. They hold your kayak steady while you lift yourself over your boat, keeping your body low to maintain balance. Once you’re seated, they help secure your paddle.
Q: In what ways can you modify your kayak to aid in self-rescue scenarios?
A: Adding extra handles or straps can provide better grip points when maneuvering during a rescue. Also, installing thigh braces or adjustable foot pegs can give you more control over your kayak during a re-entry.
Q: How do you effectively execute a kayak self-rescue in rough water conditions?
A: Staying calm is essential. Use the paddle float to stabilize your kayak while you re-enter. Point your kayak into the waves rather than parallel to avoid tipping again. Practice in calmer waters first to build confidence and muscle memory.
Q: What are the best practices for performing a kayak self-rescue if you’re paddling an inflatable model?
A: Inflatables can be trickier due to their flexibility. Focus on keeping the kayak steady while you re-enter. Practice maintaining balance by practicing in calm waters first. Secure gear inside the kayak to avoid extra movement, which can throw off your balance.

13 thoughts on “Kayak Self Rescue: Essential Techniques for Paddler Safety [Updated 2024]”